Your first deploy
This walkthrough deploys a public web service from the dashboard, step by step. The same flow from the terminal is in From the CLI.
Before you start
Section titled “Before you start”- A BitsReef account and an organization (created for you at signup).
- Something to deploy. We’ll use the public
nginx:latestimage; substitute your own image or a Git repo.
Create a project
Section titled “Create a project”A project groups related services.
- From your organization’s dashboard, click New Project.
- Name it and open it — you land on the project canvas.
Deploy a service from an image
Section titled “Deploy a service from an image”- On the canvas, click Add Service.
- Service Name:
web. - Source Type: Container Image.
- Image:
nginx:latest. - Exposed Port:
80(the port nginx listens on). - Click Create Service.
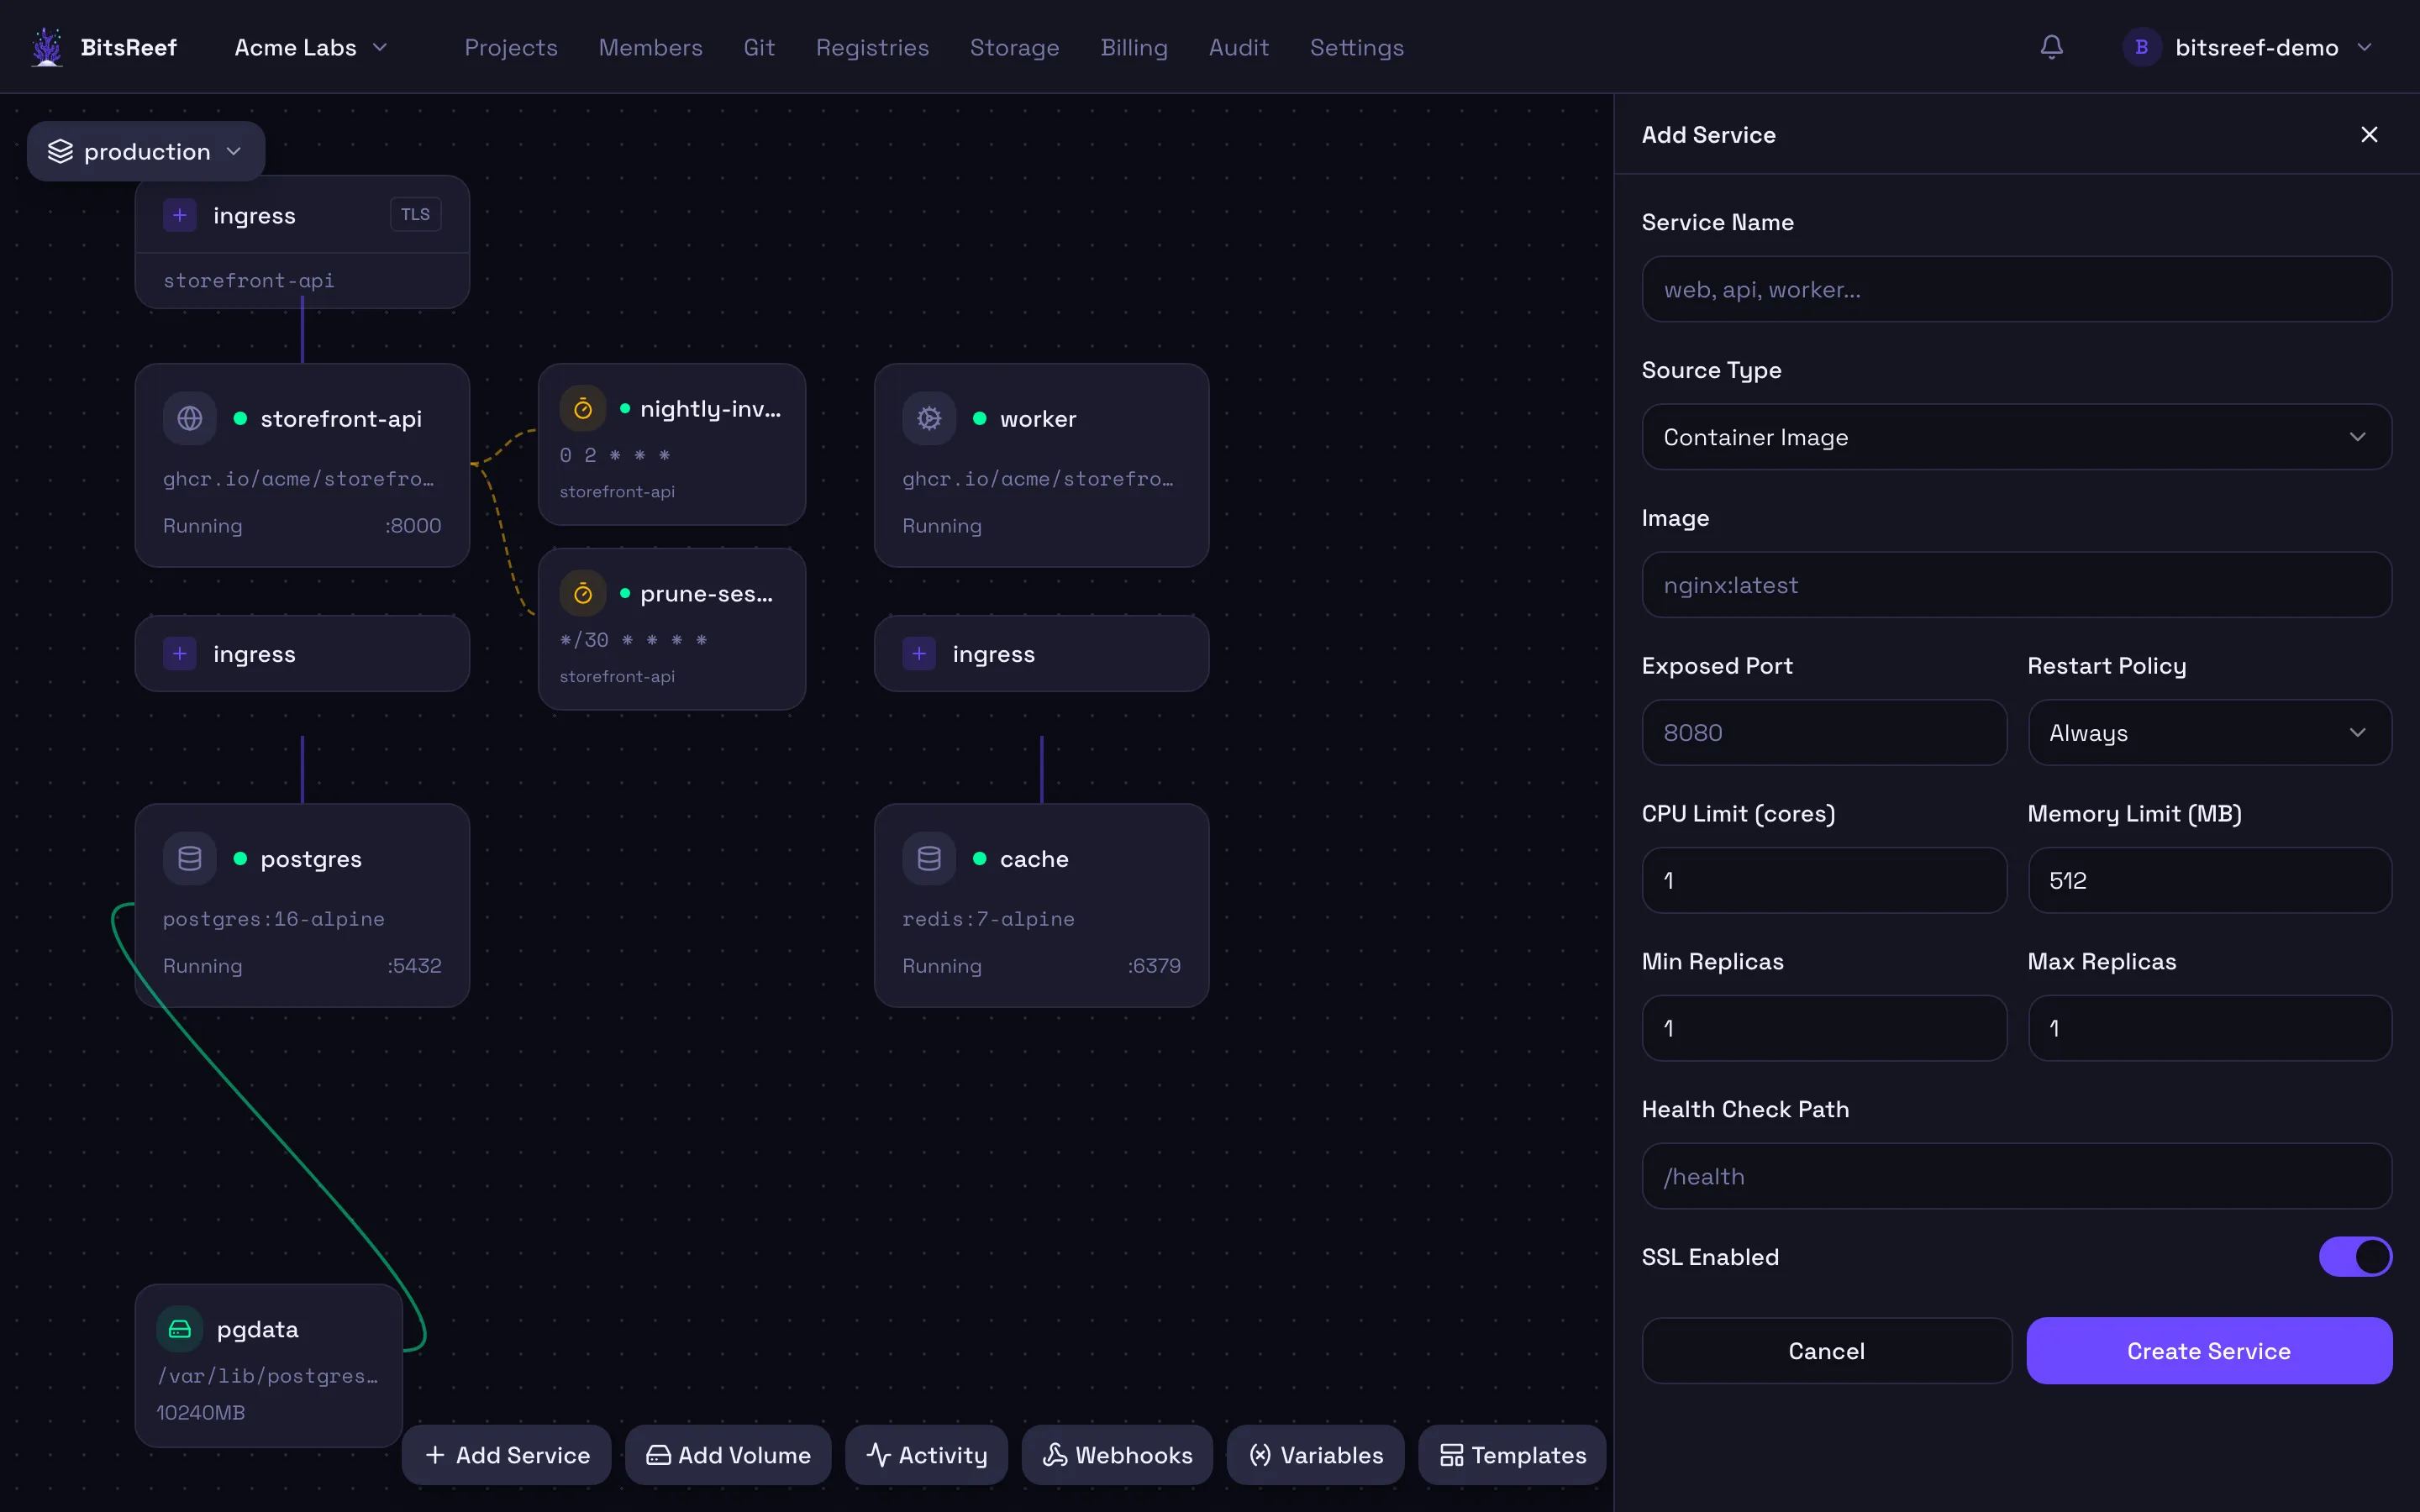
BitsReef pulls the image, starts it, and assigns a public URL with automatic HTTPS.
Watch it come up
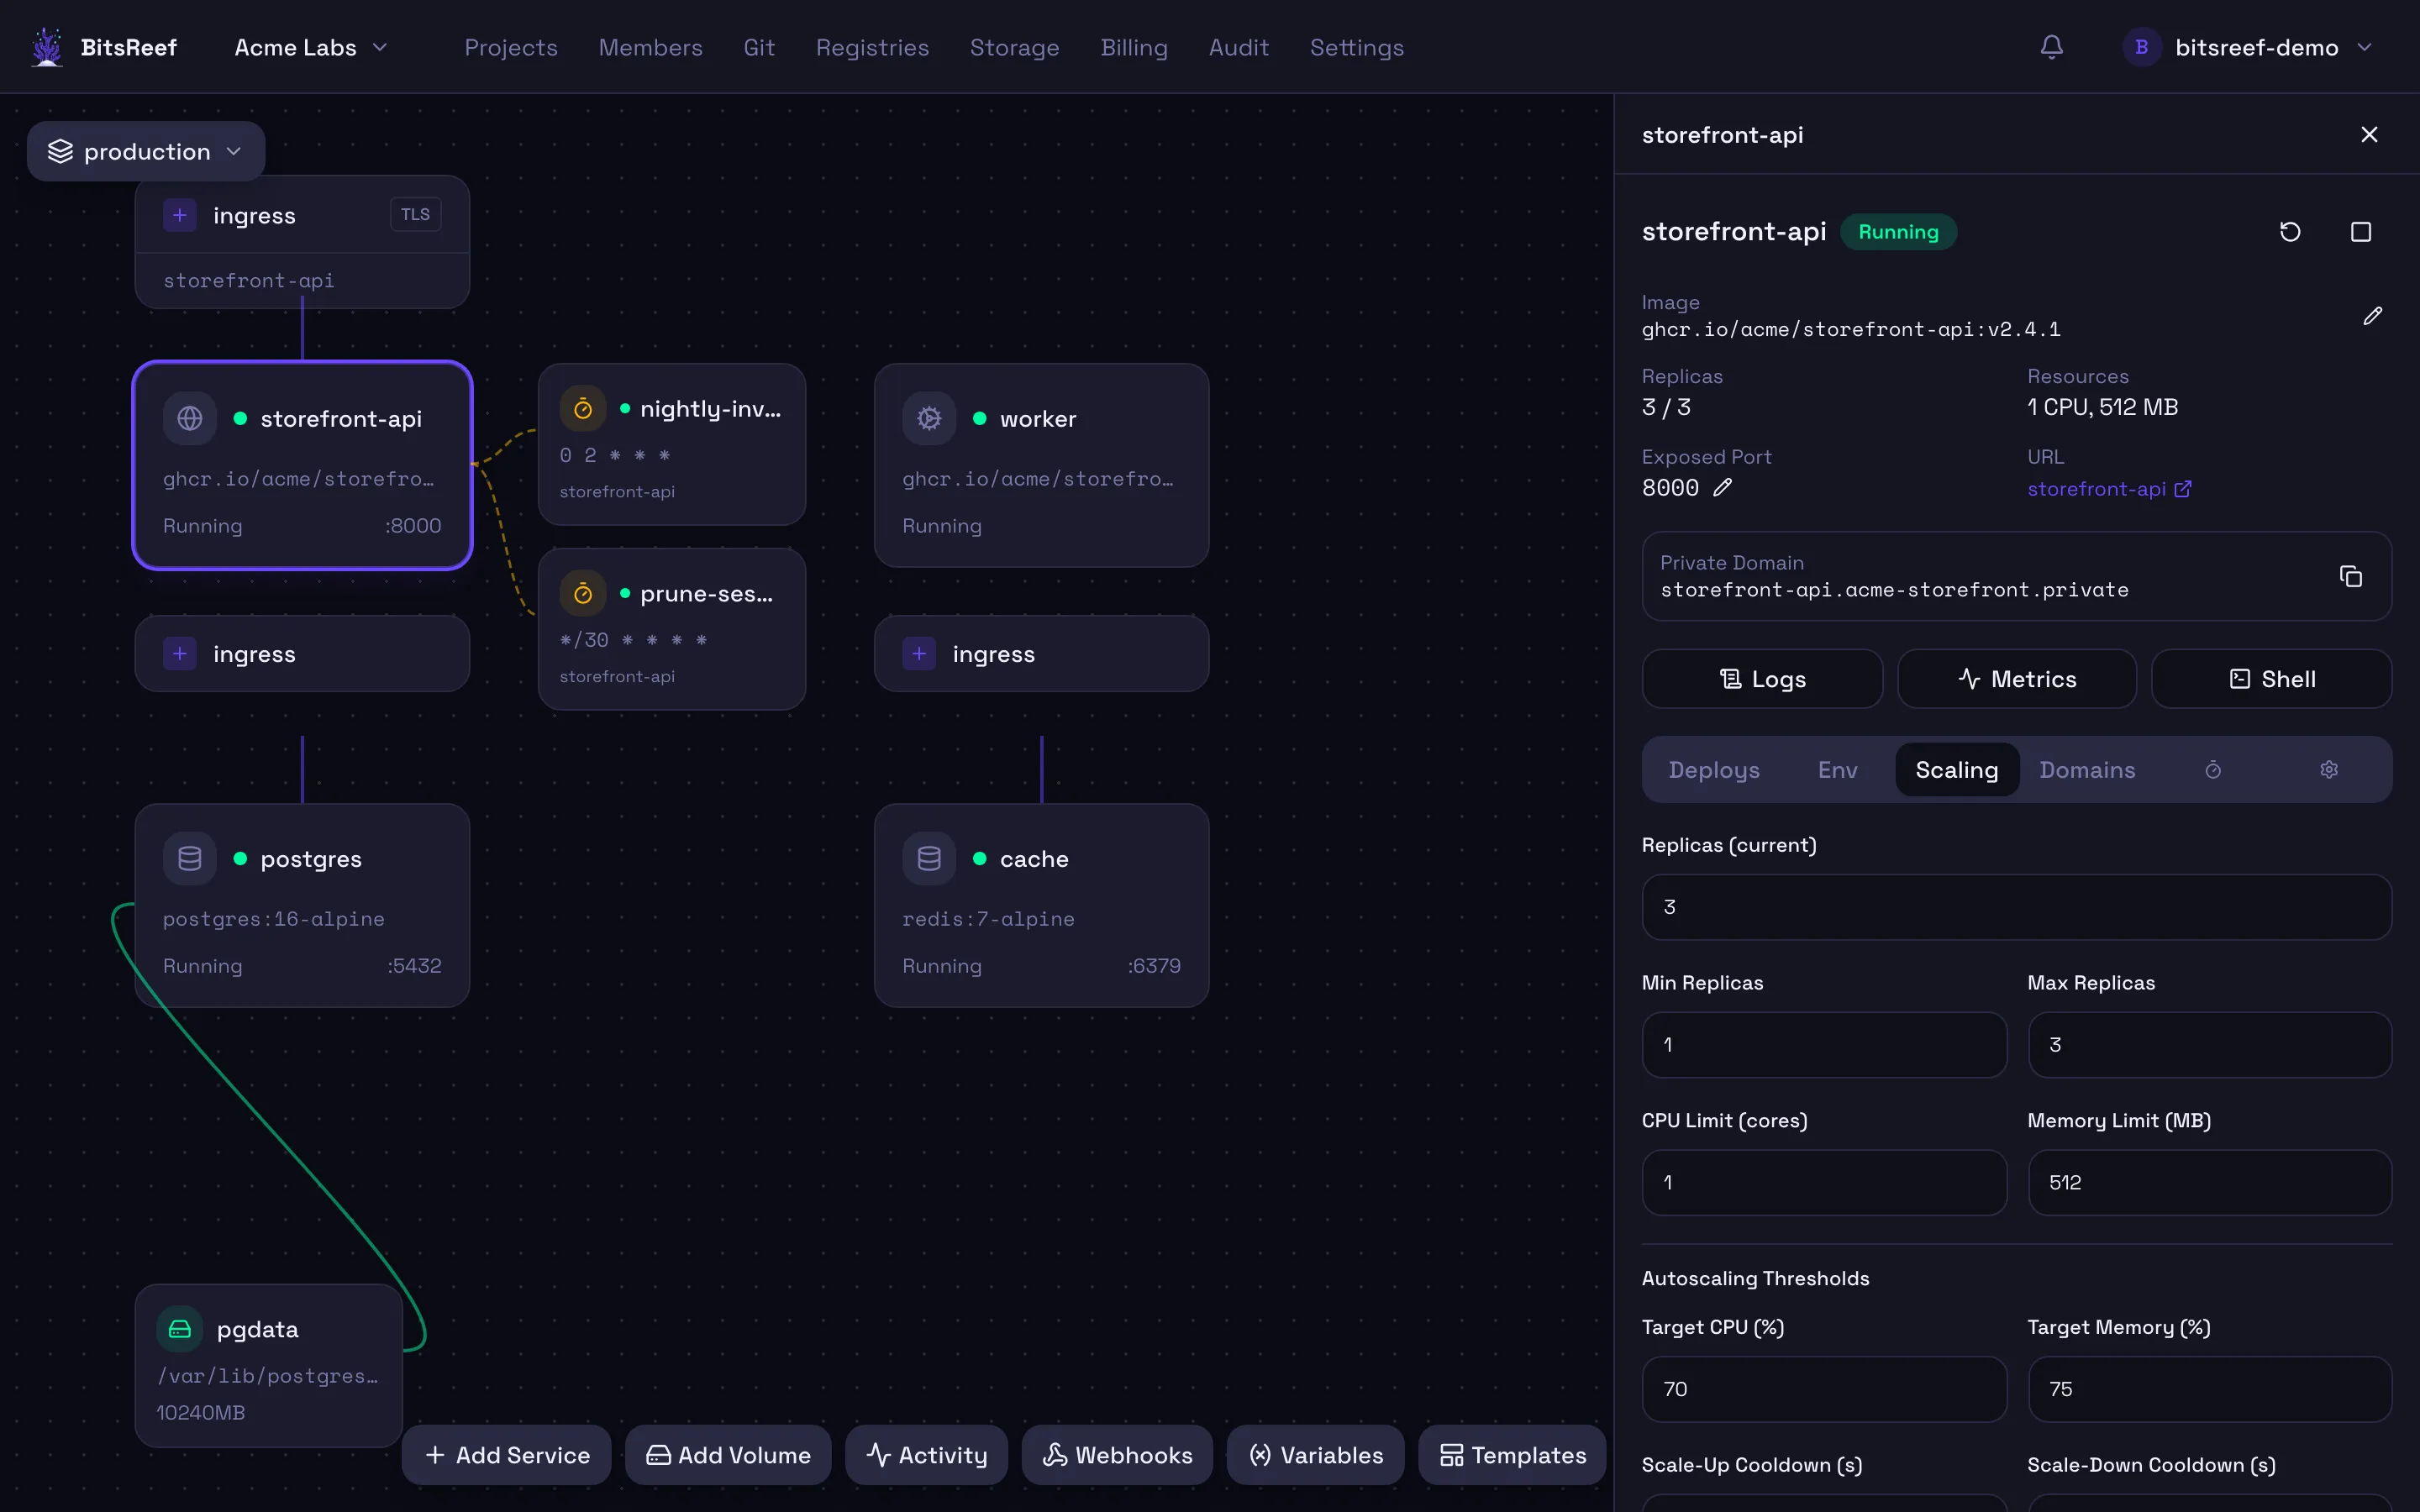
Section titled “Watch it come up”Open the service on the canvas. You’ll see its status, public URL, and buttons for Logs, Metrics, and Shell, plus tabs:
- Deploys — build/deploy history and live progress.
- Env — variables & secrets.
- Domains — custom domains.
- Scaling — replicas & autoscaling.
- A cron tab for scheduled jobs, and config.
Make a change and redeploy
Section titled “Make a change and redeploy”Deploy a new image tag — BitsReef performs a rolling update:
- Open the service and edit its image to
nginx:1.27(in the service’s Config). - Deploy again.
If something’s wrong, open Deployments and roll back to a previous one.
From the CLI
Section titled “From the CLI”The same deploy from the terminal — handy once you’re automating:
# One command creates the service and rolls it out, streaming logs:bitsreef up --project my-project --name web --image nginx:latest --port 80 --follow
# Redeploy a new tag:bitsreef up -p my-project -n web -i nginx:1.27 --follow
# Roll back:bitsreef deploy rollback --service web
Tip: run bitsreef link --project my-project --service web once, and you can
drop the --project/--name flags in this directory afterward. See
linking.