Quickstart
This guide takes you from zero to a running service with a public HTTPS URL, using the web dashboard. Prefer the terminal? Every step has a CLI equivalent — see From the CLI at the end.
1. Create an account
Section titled “1. Create an account”Sign up at bitsreef.com and verify your email. A personal organization is created for you automatically — you can add more later and invite teammates (see Teams & roles).
2. Create a project
Section titled “2. Create a project”A project groups related services.
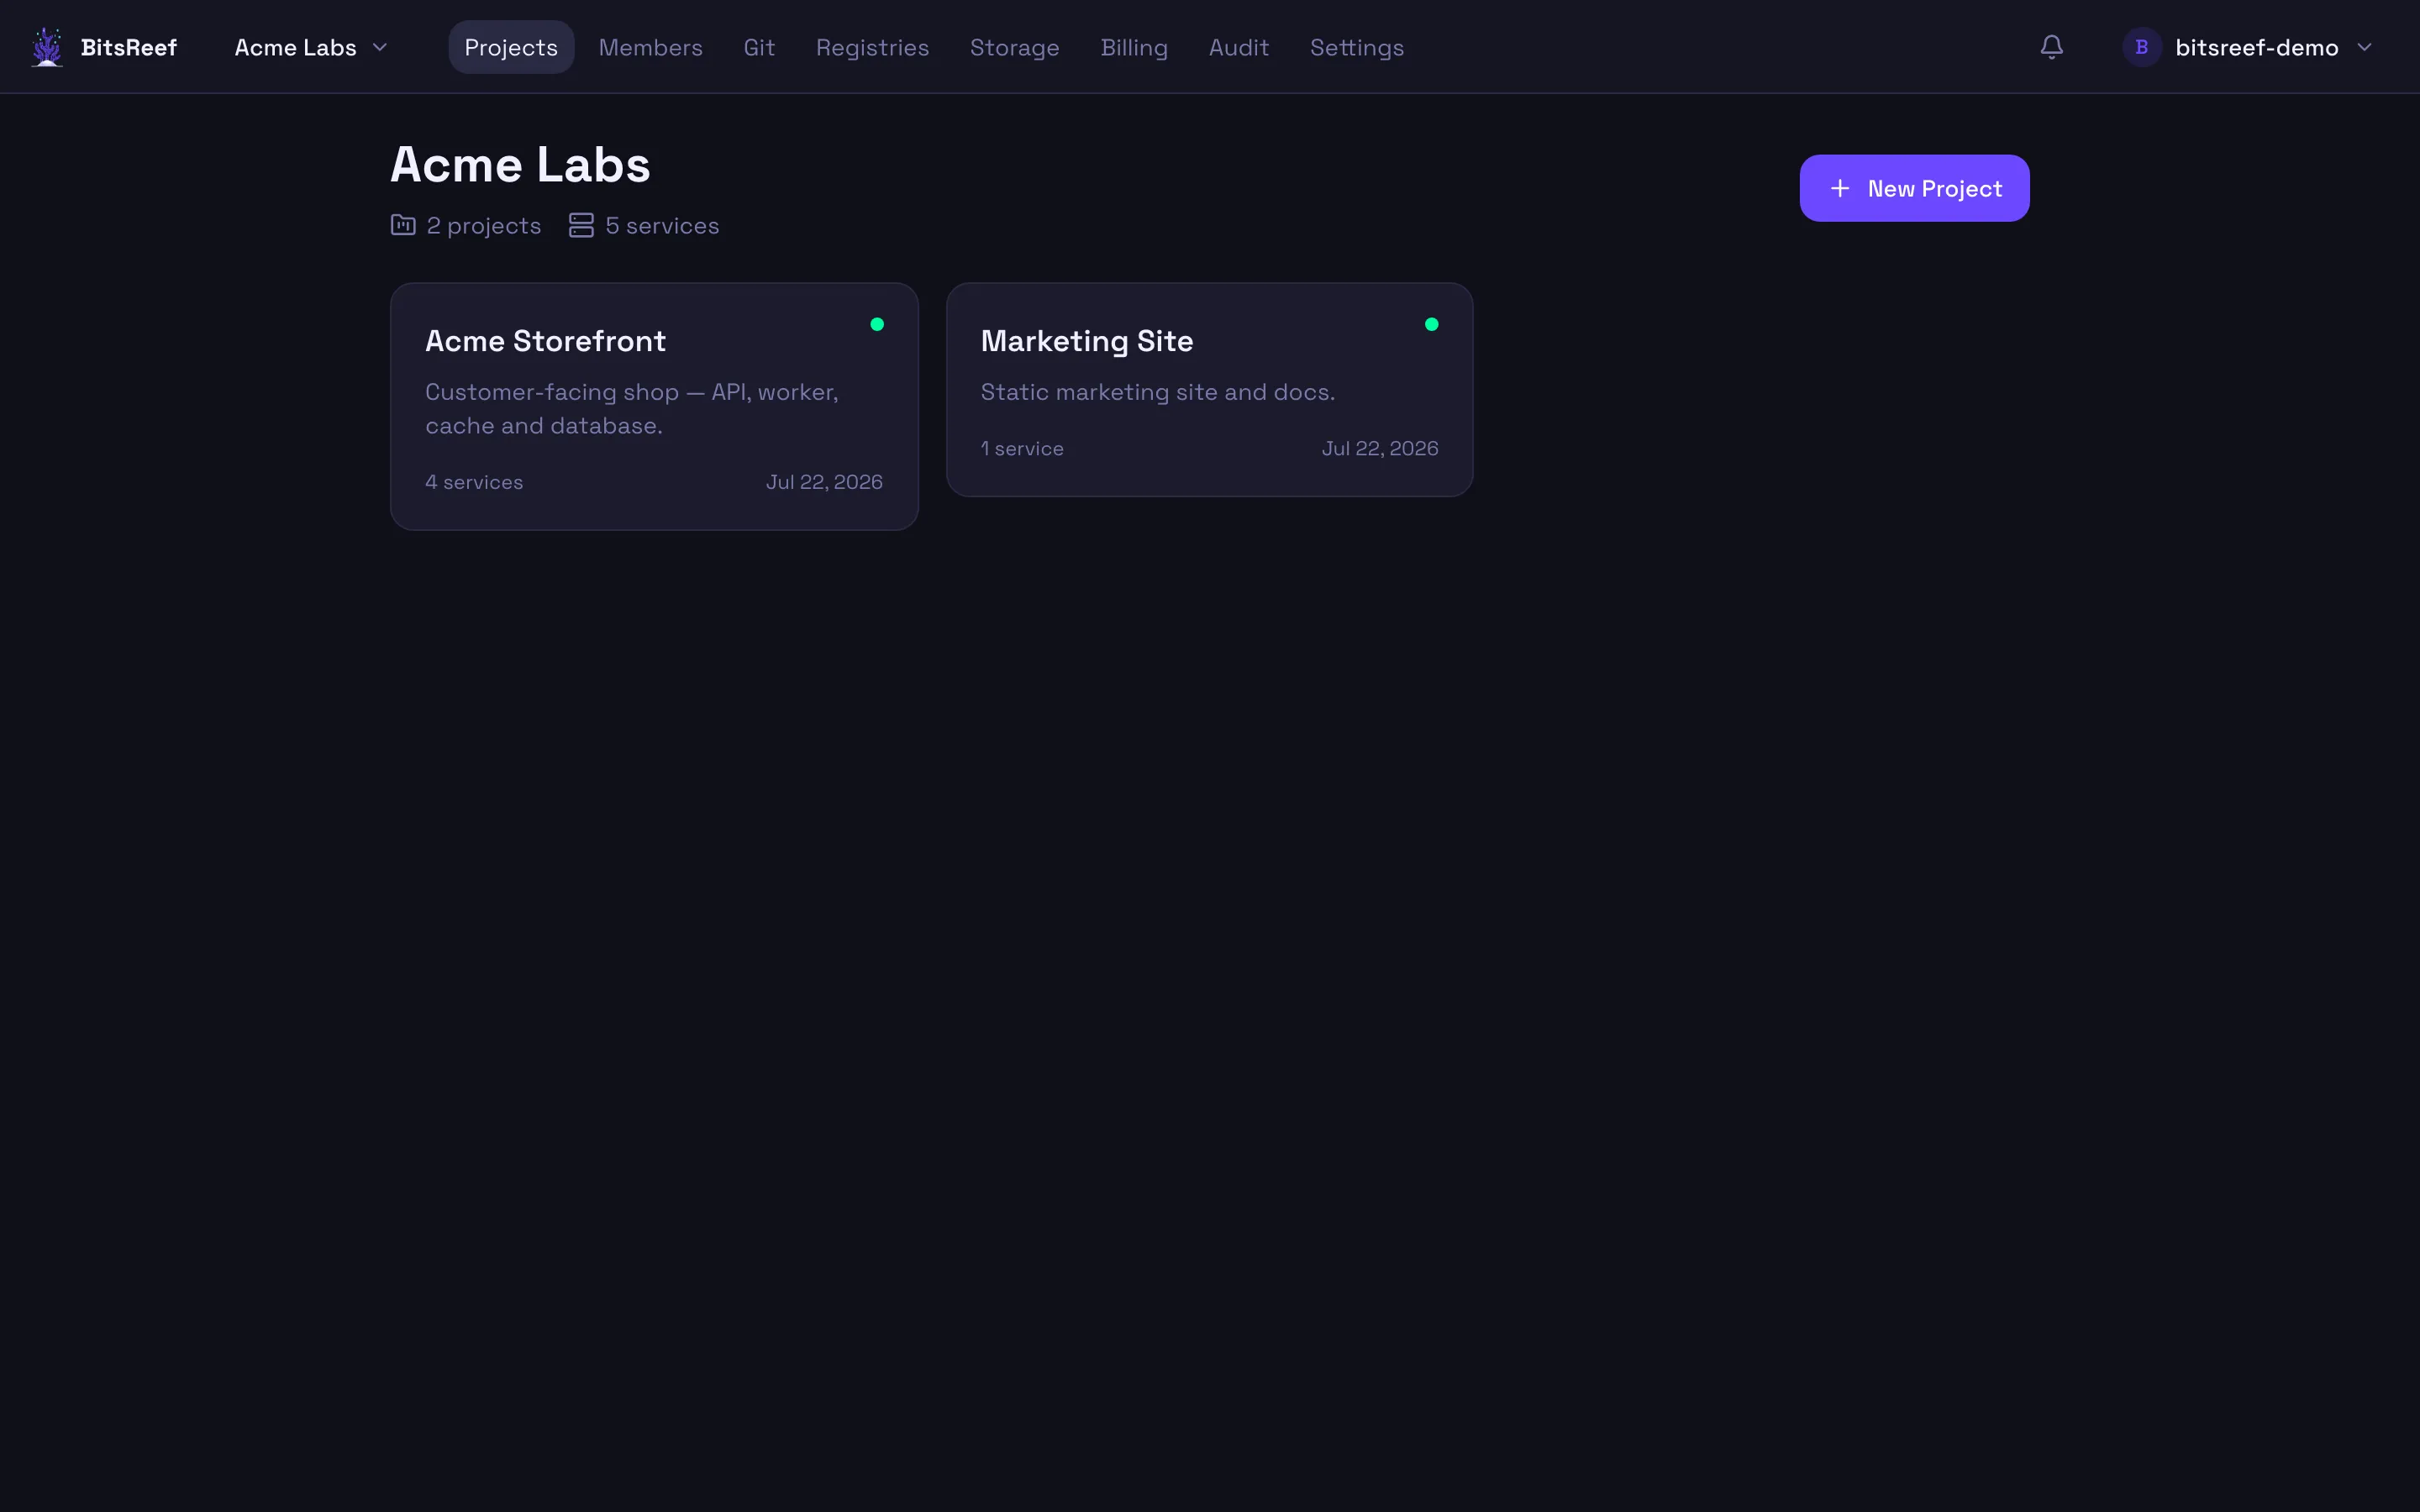
- From your organization’s dashboard, click New Project.
- Give it a name and open it. You land on the project canvas — the space where your services live.
3. Deploy a service
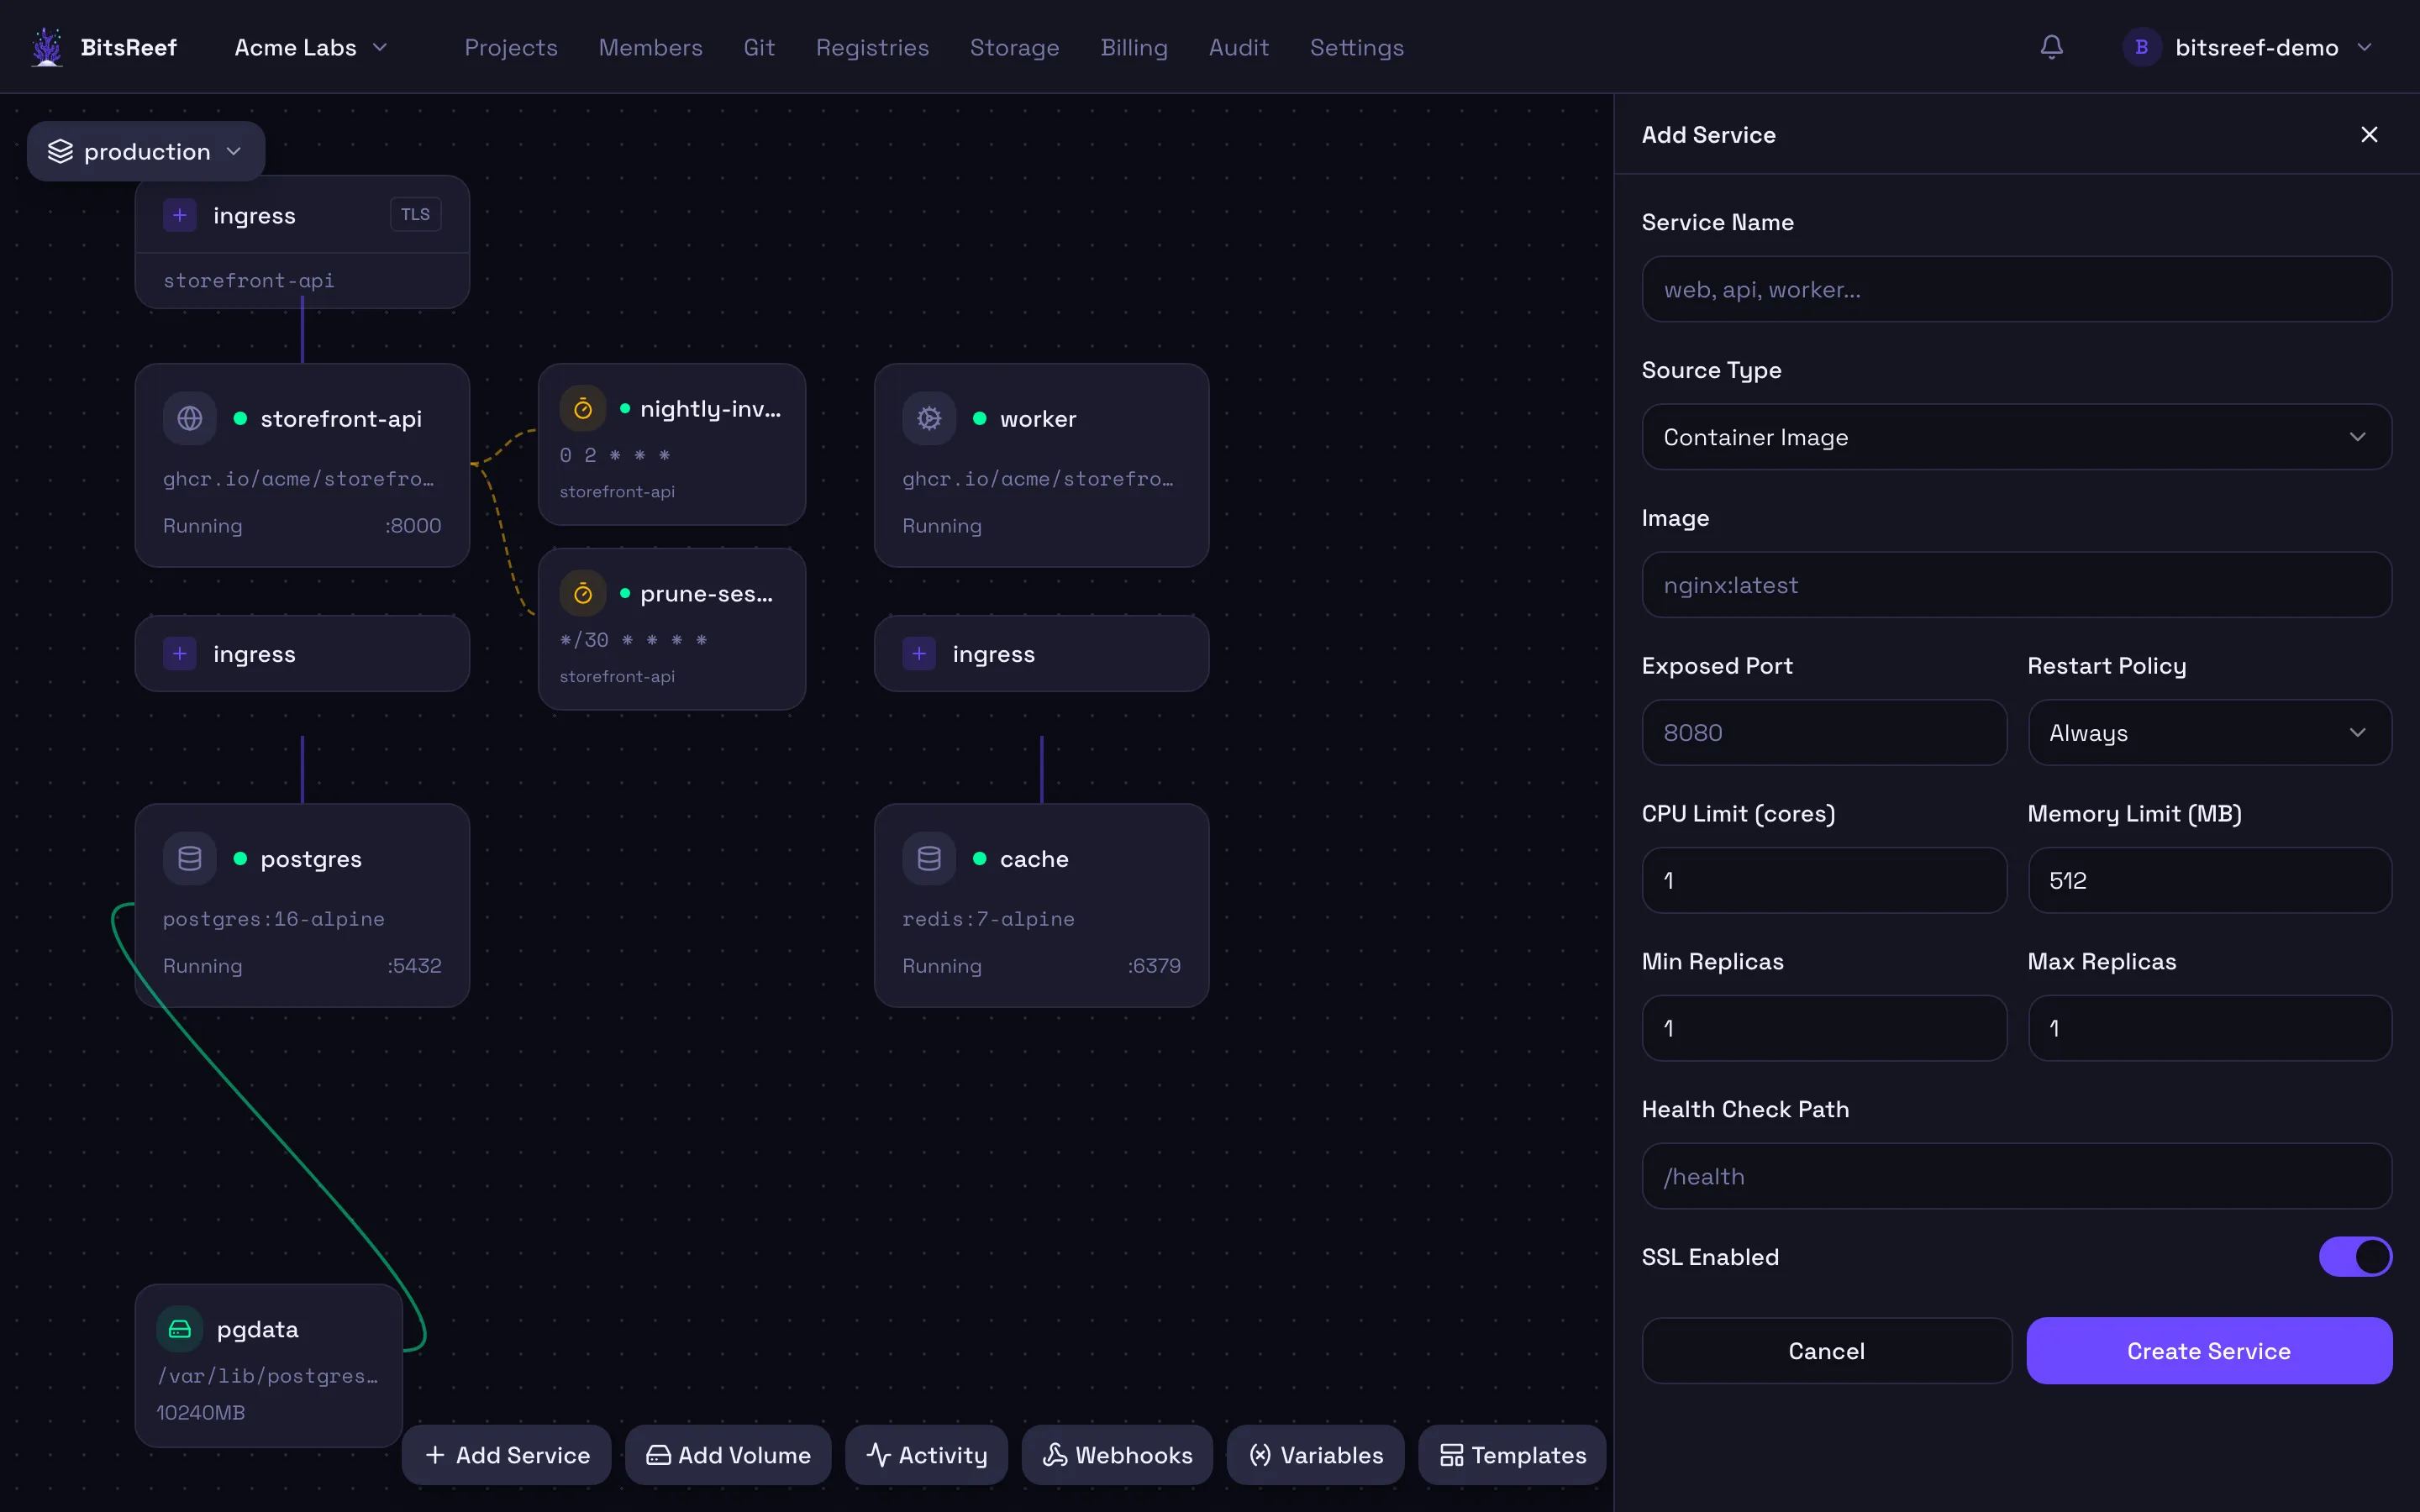
Section titled “3. Deploy a service”- On the project canvas, click Add Service.
- Enter a Service Name (e.g.
web). - Set Source Type to Container Image and enter an image —
we’ll use
nginx:latest. - Set the Exposed Port your container listens on (
80for nginx). - Click Create Service.
BitsReef pulls the image, starts it, wires up routing, and provisions a TLS certificate. You can watch the deploy progress live on the service.
4. See it live
Section titled “4. See it live”Open the service on the canvas to find its public URL and tabs for Deployments, Environment, Domains, Scaling, and logs. Click the URL — it’s served over HTTPS with a certificate BitsReef issued for you.
Next steps
Section titled “Next steps”- Your first deploy — the same flow explained step by step.
- Add a custom domain or environment secrets.
- Configure autoscaling.
From the CLI
Section titled “From the CLI”Everything above is available from the bitsreef CLI too —
ideal for automation and CI:
# Install and log inpipx install bitsreef-clibitsreef auth login
# Create-or-update a service and stream the deploy to completionbitsreef up --project my-project --name web --image nginx:latest --port 80 --follow
bitsreef up exits non-zero if the deploy fails, so it drops straight into a
pipeline. See the CLI reference for the full command set.